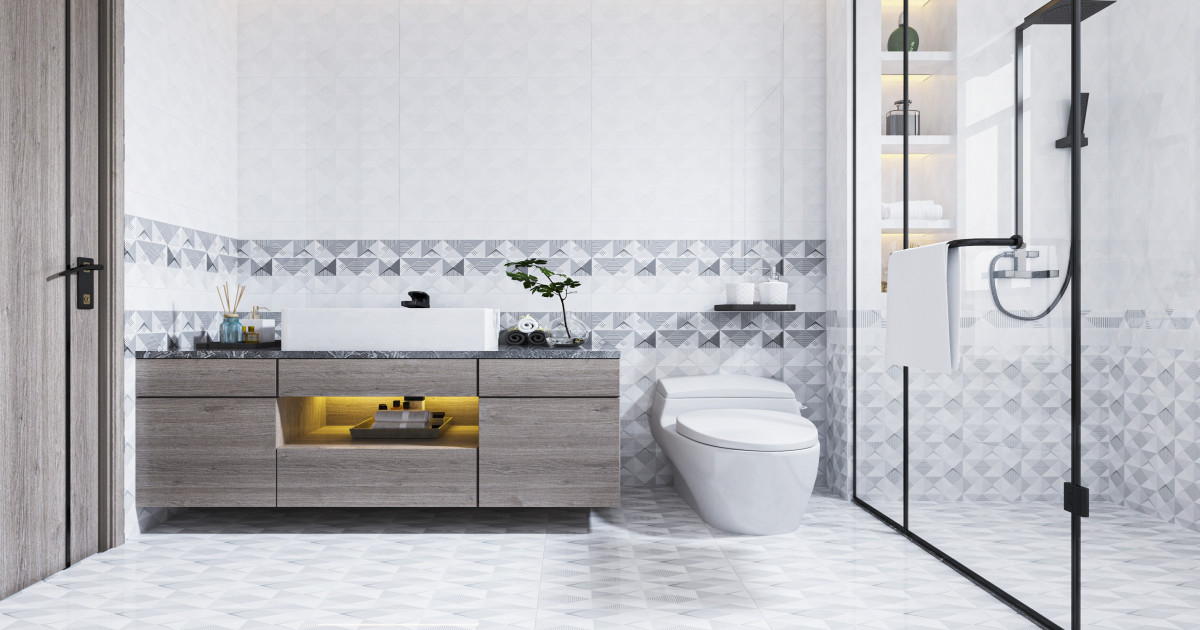
Starting a bathroom floor tiling project can be an exciting step in your renovation, but knowing exactly where to begin is essential for achieving professional results. By carefully preparing, planning, and following the correct steps, your bathroom tiling project can be a success whether you are DIYing it or hiring a professional.
Assess the Bathroom Floor Surface
Before starting your bathroom tiling project, it’s important to thoroughly assess the current condition of the floor. Ensure the subfloor is solid, clean, and level. If necessary, remove any old flooring and address any uneven areas with a self-leveling compound. Any imperfections in the subfloor can affect the final look of your tiles and their durability over time.
Choose the Right Tile Type
Bathroom floors are exposed to high levels of moisture and foot traffic, so selecting the right tile material is crucial. Porcelain and ceramic tiles are excellent choices due to their water resistance and durability. Consider choosing non-slip tiles, especially in a bathroom, as they can help prevent accidents on wet surfaces. The right tile can also add to the overall aesthetic of your bathroom.
Plan Your Tile Layout
Once you have selected your tiles, it’s time to plan the layout. Start by measuring the bathroom floor and dry-laying the tiles to visualize the layout. Aim to start tiling from the center of the room to ensure symmetry, meaning that any cut tiles at the edges will be even. Use a chalk line or laser level to mark straight guide lines on the floor, which will help keep your rows of tiles aligned during installation.
Prepare and Apply Adhesive
Once your layout is planned, mix the tile adhesive according to the manufacturer’s instructions. Spread the adhesive evenly across the floor using a notched trowel, starting from the center of the room. Apply the adhesive in manageable sections to ensure it doesn’t dry out before you lay the tiles. Proper application of adhesive will ensure a secure bond between the tile and subfloor.
Lay the Bathroom Tiles
Begin laying the tiles from the center, following the guide lines you’ve marked. Use tile spacers to maintain even gaps between tiles, and regularly check that the tiles are level using a spirit level. Press each tile firmly into place to ensure proper adhesion. Continue working outward towards the walls, ensuring that each tile is properly positioned before the adhesive starts to set.
Cutting Tiles for the Edges
As you reach the edges of the bathroom, you will need to cut tiles to fit. Use a tile cutter or wet saw to cut the tiles to size, taking care to measure accurately to avoid mistakes. When cutting tiles around fixtures like toilets or sinks, use a tile nipper or contour gauge to make precise cuts. Always double-check your measurements before cutting to ensure a perfect fit.
Allow the Adhesive to Dry
After laying all the tiles, it’s important to let the adhesive fully dry. Depending on the type of adhesive used, this may take between 24 to 48 hours. Avoid walking on the tiles during this time to prevent them from shifting or becoming uneven. Following the drying time recommended by the adhesive manufacturer is essential for achieving a strong, durable bond.
Grouting the Tiles
Once the adhesive has dried, it’s time to apply grout to fill the gaps between the tiles. Mix the grout according to the instructions, and use a grout float to spread it evenly over the tiles, pressing it into the joints. Be sure to wipe away any excess grout with a damp sponge before it dries on the surface of the tiles. Allow the grout to dry for the recommended time, then clean the tiles with a dry cloth to remove any haze.
Seal the Grout
Sealing the grout is an important step that helps protect it from moisture and stains, particularly in a bathroom environment. Apply a grout sealant once the grout has fully dried, ensuring even coverage over all the joints. A well-sealed grout will extend the lifespan of your tiled floor and keep it looking clean and fresh.
Final Touches
Once the grout has dried and the floor is sealed, reinstall any fixtures that were removed, such as baseboards or vanity units. Apply silicone caulk around the edges of the floor where the tiles meet the walls, providing a watertight seal that prevents moisture from seeping into the gaps. This finishing touch ensures a clean, professional appearance for your bathroom floor.
Professional Bathroom Tiling Services
If tiling a bathroom floor feels like too big of a project, or if you want a perfect finish without the hassle, hiring a professional tiler is a great option. A professional can ensure that your Bathroom Tiling project is completed to the highest standard. For those in Melbourne, contacting a reliable Tiler Melbourne ensures that the job is done quickly and efficiently with lasting results.
Ongoing Maintenance
Proper maintenance is key to keeping your tiled bathroom floor in good condition. Regular cleaning with mild, non-abrasive cleaners will help keep the tiles looking their best. Check the grout periodically for signs of wear or damage and reapply sealant as needed. Keeping the floor dry and clean will help prolong its life and maintain its aesthetic appeal.
Budgeting for Your Tiling Project
The cost of tiling a bathroom floor can vary depending on several factors, such as the size of the room, the type of tiles you choose, and whether you opt for professional installation. While doing it yourself can save on labor costs, hiring a professional can be more cost-effective if you want a flawless finish and avoid the risk of costly mistakes. It’s worth getting quotes from multiple professionals to find the best value for your project.
Final Considerations
Tiling a bathroom floor requires careful planning, precision, and patience. By following these steps, you can create a durable and attractive floor that enhances the functionality and appearance of your bathroom. Whether you choose to take on the task yourself or hire a professional, the key is to prepare thoroughly and pay attention to detail throughout the process. With proper execution, your bathroom floor will provide both style and practicality for many years to come.


